Best Backsplash Options for RV Kitchen: Durable, Easy DIY Solutions
Answering the common RV kitchen makeover question: peel-and-stick backsplashes offer a fast, mess-free way to upgrade tiny spaces. This guide highlights five top choices that balance moisture resistance, ease of installation, and RV-friendly durability. The best picks are suited for different needs: lightweight travelers seeking quick style updates, renters who must remove without damage, and RV owners who want a heat- and water-resistant surface that holds up on long trips.
| Product | Best For | Key Benefit |
|---|---|---|
| Art3d 10-Sheet Heavy-Duty Peel and Stick | General RV use | Extra thick, strong adhesion |
| StyloVue 20 Sheets White Marble | Budget-friendly luxury look | Eco-friendly design, easy DIY |
| StyloVue 100 Pieces 3×6 Subway | Full backsplash projects | Large area coverage, durable PVC |
| Art3d White Subway 10 Tiles | Classic, clean look | Thicker design, strong backing |
| Tiwoos 12×12 3D Marble Tiles | Rugged RV environments | Thick, heat- and moisture-resistant |
Art3d 10-Sheet Heavy-Duty Peel and Stick

The Art3d heavy-duty option is 0.08 inches thick, delivering 2–3 times the strength of standard peel-and-stick tiles. It provides a seamless, tool-free installation with a premium adhesive designed for a secure bond to RV walls. This tile set is best for RV owners who want a durable, water-resistant backsplash that can endure travel vibrations and occasional moisture exposure. Caution: ensure surfaces are clean and smooth for best adhesion on curved RV walls.
StyloVue 20 Sheets White Marble with Metal Look

StyloVue’s premium PVC sheets offer excellent waterproof and heat resistance. The 20-sheet pack suits RV kitchens where a larger area needs coverage with a consistent white marble with a subtle metal accent for a brighter, modern look. Best for RV owners who want a stylish upgrade without professional installation. A note: measure carefully before applying due to the high-adhesion quality, and avoid overly textured walls if possible.
StyloVue 100 Pieces Peel and Stick Subway Tiles

This 100-piece set provides ample coverage with 3″ x 6″ PVC subway tiles, mimicking the classic real tile look. It’s waterproof, stain-resistant, and easy to cut for outlets and corners. Best for RV kitchens that require an extended white subway aesthetic at a budget-friendly price. Limitation: larger projects demand careful planning to avoid visible seams, so layout ahead of time.
Art3d Peel and Stick White Subway (10 Tiles)
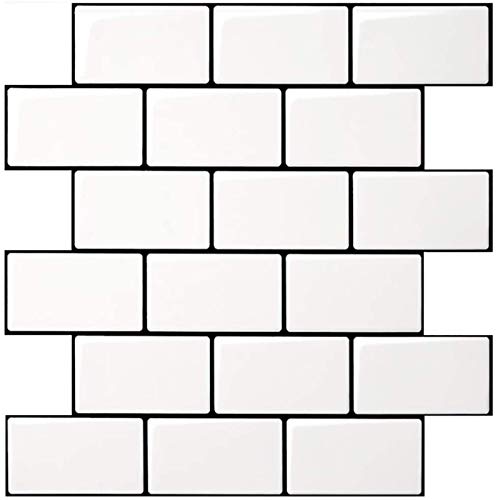
This thicker Art3d subway tile entry emphasizes a 2–2.5 mm thickness with a stronger 3× backing adhesive. The surface uses a PU gel top with PET bottom, avoiding epoxy resins and potential yellowing. Best for RVers who want a sturdy, subway-style backsplash with long-lasting adhesion. Caution: ensure the wall is smooth and clean for optimal stickiness on curved or gloss-coated RV interiors.
Tiwoos Thick Peel and Stick Marble Tiles
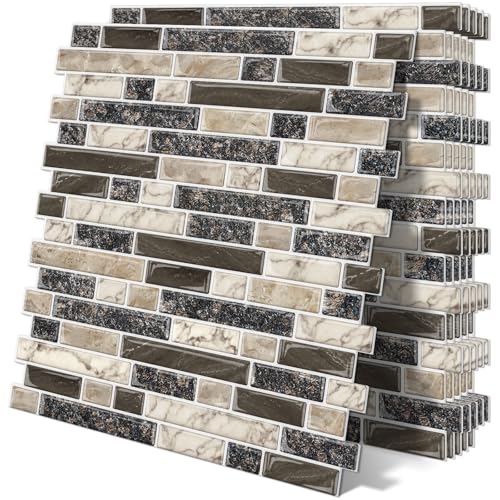
Tiwoos offers a thickened 12″ x 12″ sheet that mimics a 3D marble look, designed for kitchens and bathrooms in RVs. It’s heat- and moisture-resistant, suitable for splash zones around sinks and ranges. Best for RV setups needing a premium appearance without heavy remodeling. Limitation: not recommended for direct immersion or high-heat areas like open flames; maintain proper ventilation and avoid prolonged exposure to heat sources.
Buying Guide: Selecting The Right RV Backsplash
- Material and Thickness: Thicker tiles tend to offer stronger adhesion and durability in moving vehicles. PVC and PU-based surfaces hold up well against humidity and heat.
- Adhesive Strength: Look for “strong backing” or “premium adhesive” if you frequently travel on rough roads. A higher bond reduces peeling risk.
- Surface Suitability: Ensure the RV interior walls are clean, smooth, and non-textured for best results. Avoid rough, very textured surfaces that hinder sticking.
- Maintenance and Cleaning: Choose waterproof, stain-resistant options for easier cleaning in compact kitchens where spills are common.
- Aesthetic Goals: For a classic look, white subway or marble textures pair well with most RV interiors. For a modern vibe, opt for beige, gray, or metallic accents.
Material and Application Tips
Prepare surfaces by cleaning with a mild degreaser, let dry completely, and lightly sand glossy areas to improve adhesion. Use a sharp utility knife to trim tiles for corners and edges. If relocation is needed, some tiles can be gently heated to release adhesive, then re-applied with fresh backing.
Installation Considerations By RV Type
Class-C and travel trailers with rigid walls benefit from a flat, smooth backing. For curved or rounded cabinet edges, a flexible edge trim or curved-cap tile mesh can help achieve a clean finish. Consider temporary wall liners for extra protection during transit if the RV experiences frequent bumps.
Buying Guide: Key Purchase Considerations
- Durability vs. Weight: Prioritize thicker tiles to resist buckling or warping while remaining light enough for RV use.
- Finish and Look: White subway and marble-inspired designs provide a timeless look that matches many RV interiors.
- Coverage: For larger RV kitchens, consider 100-piece sets or larger sheets to minimize seams and speed installation.
FAQ
- Q: Are peel-and-stick backsplashes suitable for RV kitchens with frequent movement? A: Yes, if you choose thicker tiles with strong adhesive and follow proper surface prep.
- Q: Can I remove peel-and-stick tiles without leaving residue? A: Most are designed for easy removal, but test a small area first to confirm residue-free removal.
- Q: Do these backsplashes tolerate heat near stoves? A: Many are heat-resistant to kitchen levels; avoid direct flame exposure and maintain ventilation near heat sources.
- Q: What is the best option for a quick RV upgrade on a budget? A: StyloVue and StyloVue subway sets offer affordable, easy installation with a fresh look.
- Q: How do I know which tile size to choose for corners and outlets? A: Plan the layout beforehand and measure around outlets; 2.95″ x 5.9″ tiles are commonly cut to fit edges.